
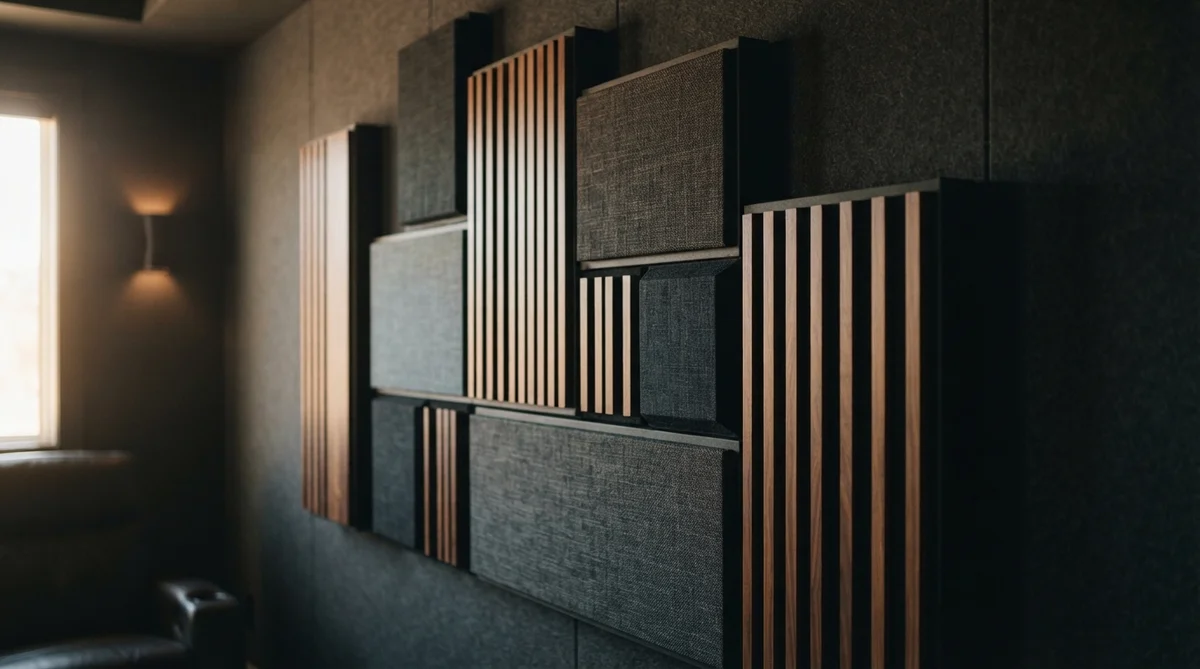
AT A GLANCE
For most home theaters, start with 8 to 16 acoustic panels, then adjust the count according to room size, speaker layout, and existing soft furnishings.
- Small room: 6 to 10 panels, including at least 2-inch-thick panels at the first-reflection points.
- Medium room: 10 to 16 panels, plus bass traps if the front or rear corners sound boomy.
- Large or very reflective room: 16 to 24 panels, with ceiling treatment considered after the walls.
- Practical target: Treat roughly 10% to 20% of the room’s wall and ceiling surface, rather than covering every hard surface.
The right number depends less on the number of speakers than on the room’s reflective surfaces, panel dimensions, and the amount of absorption already provided by carpet, curtains, sofas, and seating.
How Many Acoustic Panels Does a Home Theater Need?
A typical home theater needs 8 to 16 panels for a useful first treatment, but the count is only a starting point. You should place panels at the strongest reflection points before adding treatment to broad areas of the room.
Quick estimate by room size
| Room size | Starting count | Typical panel size | Best first use |
|---|---|---|---|
| Small, up to 150 sq. ft. | 6 to 10 | 2 by 4 ft. | Side-wall reflections and front corners |
| Medium, 150 to 250 sq. ft. | 10 to 16 | 2 by 4 ft. | Side walls, rear wall, and bass control |
| Large, 250 to 400 sq. ft. | 16 to 24 | 2 by 4 ft. | Reflection points, rear wall, and ceiling |
| Open-plan or very live room | 20 to 30 | 2 by 4 ft. | Distributed absorption and corner treatment |
These are 2026 planning estimates, not a substitute for acoustic measurement. A room with plaster walls, a hard floor, and little furniture can need twice as many panels as a carpeted room with curtains and upholstered seats.
A practical coverage target
Use 10% to 20% coverage as a sensible starting range for a dedicated home theater. A surround system in a bare room may justify moving toward 20% to 30%, while a furnished room may sound balanced below 10%.
Do not interpret coverage as a reason to cover every square foot. Absorption should control early reflections and excessive decay while leaving enough natural ambience for music, dialogue, and effects. The Acoustical Society of America’s room-acoustics guidance, checked in 2026, supports treating reverberation as a measurable room property rather than relying on a fixed panel count.
How to Calculate the Right Number of Panels
You can estimate the number of panels with a simple area calculation, then refine the result by listening from the main seats. The formula is: room surface area to treat divided by panel surface area equals the approximate panel count.
Measure the room and wall surface area
Measure the room’s length, width, and wall height in feet. For a first estimate, calculate the four wall areas, then add the ceiling only if the room has a hard floor, a low ceiling, or audible flutter echo.
For example, a room measuring 12 by 18 ft. with 8-ft. walls has approximately 480 sq. ft. of wall surface: 2 × (12 + 18) × 8. Treating 15% of that area requires about 72 sq. ft. of absorption.
Choose a coverage percentage based on your acoustic goals
Choose the lower end of the range when you want a lively room with clear surround effects. Choose the higher end when speech sounds smeared, claps ring around the room, or bass and effects remain audible long after the original sound.
- 10% coverage: basic control in a carpeted, furnished room.
- 15% coverage: balanced starting point for a dedicated theater.
- 20% to 30% coverage: stronger control for a bare, large, or highly reflective room.
Dolby Laboratories’ home theater guidance, checked in 2026, emphasizes speaker positioning and room interaction rather than a universal treatment quantity. That is why a panel count should follow the room and the speaker layout, not the number printed on an amplifier.
Convert coverage area into the number of panels
A standard 2 by 4-ft. panel covers 8 sq. ft.. In the example above, 72 sq. ft. divided by 8 sq. ft. gives 9 panels, so you could begin with 10 panels to allow for placement gaps and uneven wall areas.
Count bass traps separately when they are much thicker than the wall panels. A corner trap may occupy significant volume but should not be treated as the same thing as a flat 2 by 4-ft. absorber.
Factors That Change the Panel Count
The estimated number changes when the room, furnishings, speakers, or listening goal changes. Check these variables before ordering a complete set.
- Room size, shape, and ceiling height: Tall ceilings and long rectangular rooms create more surfaces for reflections. L-shaped rooms may need treatment in each listening zone.
- Hard surfaces and existing furnishings: Tile, glass, bare drywall, and hardwood increase reflection density. Carpet, curtains, bookcases, and upholstered seating reduce the amount of additional absorption required.
- Speaker system and seating arrangement: A 5.1 system has fewer speaker interactions than a 7.1.4 Dolby Atmos layout. Multiple seating rows require more consistent treatment across the room.
- Desired sound: Dialogue clarity usually needs early-reflection control. Stronger reverberation control requires more distributed absorption, especially on the rear wall and ceiling.
For speaker placement, consult this Dolby Atmos speaker setup guide before fixing panel positions. Moving a speaker later can shift the reflection points by several feet.
Where to Place Acoustic Panels in a Home Theater
Place the first panels where sound reaches the listener after one strong bounce from a speaker. Use a mirror method from the main seat: wherever you can see a speaker in a wall mirror, mark that spot as a first-reflection point.
First-reflection points on the side walls
Start with 2 to 4 panels on the side walls, positioned between the screen and the main listening seats. Center each panel at the height of the tweeters or roughly ear level when seated.
Do not place every panel directly beside the speakers. The goal is to absorb the early side-wall bounce that can blur dialogue and stereo imaging.
Front wall behind the screen and speakers
The front wall benefits from 2 to 4 panels, particularly when it is flat, bare, and close to the speakers. Use breathable acoustically transparent treatment behind an acoustically transparent screen, but keep ventilation paths and equipment access clear.
If the screen is solid and reflects sound, place absorption around the speakers rather than blocking the screen or restricting airflow around an amplifier.
Rear wall behind the seating
The rear wall often needs 2 to 6 panels, especially when the seats are less than 3 ft. from it. Absorption reduces the strong return reflection that can make surround effects sound harsh or delayed.
When the rear seats sit farther from the wall, a combination of absorption and diffusion can preserve some spaciousness. Use deep treatment for low-frequency problems, not thin decorative foam.
Ceiling and additional reflection points
Ceiling panels are useful when the ceiling is low and hard, or when overhead speakers create a strong reflection above the seats. Begin with 2 to 4 panels above the main listening area rather than covering the entire ceiling.
A rug between the screen and seats can reduce floor reflections at lower cost. Ceiling mounting requires anchors rated for the panel weight, and heavy panels should not be fixed to suspended ceiling tiles without structural support.
Panel Size, Thickness, and Spacing
Panel dimensions and depth affect performance, so two small thin panels do not always equal one large thick absorber. Prioritize adequate thickness at reflection points, then use panel size to simplify coverage and visual balance.
How panel dimensions affect the total count
Four 2 by 2-ft. panels cover the same nominal area as one 2 by 4-ft. panel, but they create more edges and mounting points. Larger panels usually reduce installation time, while smaller panels are easier to fit around doors, sconces, and wall speakers.
Keep a small gap between separate panels when possible. Spacing makes the treatment less visually heavy and can distribute absorption across a wider section of wall.
When to choose 2-inch versus 4-inch panels
Choose 2-inch panels for mid- and high-frequency reflections when space is limited. Choose 4-inch panels for stronger broadband absorption, particularly at side-wall reflection points and on the rear wall.
Thin acoustic foam mainly affects higher frequencies and should not be presented as full home theater soundproofing. Technical guidance from GIK Acoustics, checked in 2026, similarly distinguishes broadband fabric absorbers from thin foam products and recommends thicker treatment for wider frequency control.
Why an air gap improves absorption
Leave an air gap of 2 to 4 in. behind a porous panel when the wall allows it. The gap moves the absorber into the room’s particle-velocity zone and improves low-frequency absorption compared with mounting it flush against the wall.
Use secure brackets or cleats, especially above seating. If a panel contains fiberglass or mineral wool, keep the core fully enclosed in an intact fabric cover and follow the manufacturer’s handling instructions.
Example Panel Layouts for Common Home Theater Sizes
These layouts show how a starting count can be distributed. They assume 2 by 4-ft. broadband panels, with bass traps counted separately.
| Room | Side walls | Front and rear walls | Ceiling or corners | Total |
|---|---|---|---|---|
| 12 by 14 ft. | 4 | 2 | 2 corner traps | 6 panels |
| 12 by 18 ft. | 4 | 4 | 2 ceiling panels, 2 traps | 10 panels |
| 15 by 20 ft. | 6 | 6 | 4 ceiling panels, 4 traps | 16 panels |
| Open-plan room | 8 | 8 | 4 ceiling panels, 4 traps | 20 panels |
Use the layout as a test plan, not a fixed prescription. Add panels only after listening from every occupied seat and checking whether the remaining problem is reflection, reverberation, or bass.
Acoustic Panels, Bass Traps, and Soundproofing: What Each Does
Acoustic panels reduce reflections inside the room, bass traps address low-frequency buildup, and soundproofing reduces sound transmission through walls, doors, ceilings, and floors. These are different jobs and require different materials and construction methods.
A bass trap is usually thicker and placed in a corner where low-frequency energy accumulates. It can improve bass consistency, but it cannot stop a subwoofer from transmitting through a shared wall.
Soundproofing may involve added mass, decoupled wall layers, sealed gaps, solid-core doors, and isolated ceilings. If you need to prevent complaints from adjacent rooms, consult an acoustical contractor before spending on decorative panels.
For playback fundamentals, this guide to why surround sound makes film effects feel more intense explains how room reflections influence the experience of a mix.
How to Avoid Over-Treating a Home Theater
Over-treatment makes a room sound dull, unnaturally dry, or short on spaciousness. Add absorption in stages and keep untreated or diffusive surfaces where the room needs energy and depth.
- Begin with first-reflection points, then listen for changes before treating the rear wall.
- Do not cover every wall with thin foam, which can absorb treble while leaving bass problems untouched.
- Keep some diffusion or reflective surface behind the listening area if dialogue is already clear and the room sounds lifeless.
- Measure or compare recordings from the main seats after each treatment stage, using the same volume and program material.
A room-correction system can help identify frequency problems, but it cannot replace physical treatment. Correct placement and adequate bass control should come before relying on electronic equalization.
Final Placement and Installation Checklist
Before drilling, verify the listening positions, speaker angles, panel coverage, and mounting method. A careful installation prevents avoidable damage and makes later adjustment easier.
- Mark each first-reflection point with a mirror from the main seat.
- Install 2-inch or thicker broadband panels at the side-wall reflection points.
- Use corner bass traps when bass remains uneven or boomy after speaker placement is corrected.
- Leave a 2 to 4 in. air gap behind porous panels where practical.
- Check that panels do not block projector ventilation, speakers, doors, sprinklers, or electrical access.
- Use anchors rated for the panel weight and the wall type, especially for ceiling-mounted treatment.
- Listen from every seat, then add treatment in small groups rather than buying the maximum estimate at once.
Recheck panel placement whenever you move the speakers, screen, subwoofer, or seating. Those changes can create new reflection points even when the room itself has not changed.